happy love day
PPA185 Sketch Challenge
Here is my PPA185 Sketch Challenge card. A very simple sketch to work with but it took me three tries to get it right. I guess because I have been working with red as a Christmas staple, my first two cards were too “Christmasy” even though I was working with the heart frame. Amazing how changing colors can completely change the look of a card.
Guess what holiday is next? I’ll give you a hint…choclates, roses and VALENTINES!!!
To see the other submittals for the challenge, click HERE.


PPA184 Sketch Challenge - Sneak Peek

Todays card is a mistake – sort of. I placed an order for items from the upcoming Occasions Catalog and earned some Sale-A-Bration items too! I inverted a number when ordering and was surprised when I received the Good as Gold card making kit. When sitting down to make my PPA 184 Sketch Challenge card last night, I pulled the kit out while rummaging around for what I would use to create my card. The bright, cheerful design sung out to me! As a demonstrator, the kits are not something I have used before. I cannot tell you how quick and easy this was to put together or how bright and cheery it is up close. I find the pictures never really do the cards total justice when posted on-line. I know when I love a product and use it – it sells! I will recommend this to those shopping with their bonus “dollars” during Stampin’ Up’s Sale-A-Bration (January 28 thru March 31st). Even for seasoned card makers this kit is perfect for a last minute, “must have in the mail today” card!
I used the In Color Boutique Details (130938) as my embellishments. Even though they are not exact matches, they compliment the card colors quite nicely.
The pre-cut banners are blank on the backside so you can customize the saying to your specific card!
To see the other submittals for this challenge - click here.

Sale-A-Bration Sneak Peek
Snow Buddies

frosty and friends
Countdown. It is getting down to the wire to getting those Christmas cards mailed and the gifts wrapped…that is of course if you have finished your shopping! NOT! I spent Friday night at a scrapbook event and one of the ladies there shared this cute little paper snowman. I made a bunch today for my co-workers and some to keep on hand in case I need a last minute little something - something…they were SO easy to make. I used the Stampin’ Up! circle framlelits and the polka dot embossing folder. I did not have enough black (neutral) candy dots to do them all so I used what I had on hand. The little branch hands were snowflake pieces and the nose just small triangles of pumpkin pie card stock. On the back I used the middle sized circle to cover up where I glued the ribbon to the large, bottom circle.
December Blog Hop

Welcome to the final Pals Blog Hop of 2013. This month we are showcasing projects featuring tools and supplies that should be on every crafters wish list. You may just be starting the blog hop or may have come from Debbie Mageed at Secret Stamper on the Pals Hop. If you get off track at any time, the full lineup below will help you move along from blog to blog so you see all of the amazing creations.
Today’s Blog Hop theme is WISH LIST. There are so many Stampin’ Up! must haves that it was hard to choose what card to make and what to include on my suggested WISH LIST. I went with my favorite go-to type of card – the joy fold. The ribbon pull-tab adds such a delicate touch and emanates the element of suspense and surprise of what lays inside the card.
Every card needs a base, whether it is Whisper White, Very Vanilla or any of the various colored card stock. I chose Pool Party and Real Red with Whisper White to compliment the stamped image. The DSP papers are double sided and the perfect weight (not too light and not too heavy) and are designed to match and flatter the corresponding card stocks. I chose the I Am Me designer series paper for it’s bright and fun colors. Because I chose two different sheets of paper, I actually had four different patterns to choose from and ended up using three for my layout.

wish list joy fold
I chose hello there for the greeting on the inside from the Happy Day stamp set and the doily image for the outside. I embossed the front of the card with Silver embossing powder and the inside with Black. It is an inexpensive and quick way to add an extra WOW factor to any card. The silver mini brads and the single candy dot dress it up and also add additional WOW factor. Inside I used the oval framelits to cut the greeting and layers underneath it and popped it up using dimensionals.

inside view
Some tools, such as a scorer, bone folder and cleaner are standard items. I have tried other brands of stamp cleaners and cleaning pads but have found the Stampin Scrub and cleaner that Stampin’ Up! sells is the best one that I have tried to date.
WISH LIST:
· Cardstock
· Designer Series Paper
· Stamp Sets
· Ribbon
· Embellishments
· Framelits
· Big Shot & Magnetic Platform
· Embossing Powders
· Dimensionals
· Stampin Scrub and cleaner
I will list the Envelope Liner framelit as a MUST HAVE not a wish list item!!! Lining the envelope is the icing on the cake – the cake is just not as delicious without the icing!!!
The Pool Party Ribbon I chose has retired. I could have used current ribbon but I wanted to make a point. Even though an item may retire it does not mean it is no longer compatible with current product. I am too cheap to not use what I already own!!! Thanks Mom!!!
Information + Order Numbers :
Stamp Set: Happy Day (130294)
Paper: Real Red (102482) Pool Party (122924) I Am Me DSP (130138)
Ink: Silver Embossing Powder (109131) Black Embossing Powder (109133) Versmark (102283)
Cool Tools: Big Shot (113439) Magnetic Platform (130658) Oval Collection framelits (129381) Envelope Liner framelit ( 132172) Embossing Buddy (103083) Heat Tool (129053) Stampin Scrub (126200) Cleaner (102394)
Finishing Touches: Dimensionals (104430) 1/8” Silver Mini Brads (122941) Subtle Candy Dots (130933) Pool Party Ribbon (retired)
The next stop is Marlene Heringer at So Many Toys Sol Little Time on the Pals Blog Hop! Thanks for visiting – and I hope to see you next year!


1. Amy L. Lazzell at Just A Thought...Cards by Amy
2. Peggy Noe at Prettypapercards.com
3. Lisa Ann Bernard at Queen B Creations
4. Colleen Mollema at Uncanny Crafting
5. Sue Becker at R n R Stamping
6. Nicole Watt at Pixel Maven's Retreat
7. Debra Simonis at Deb's Stampin' Grounds
8. Diane Roberts at Score at Four and a Quarter
9. Michelle Gleeson at Stampin Mojo
10. Kelly DeTommaso at Kellys Creative Corner
11. Connie Lindsey at Crafting a Joyful Life
12. Angie Blake at Angie's Musings
13. Katy McGloin at Just Fun Stamping
14. Debbie Mageed at Secret Stamper
15. martie pollard at The Crafty Bandit
16. Heringer at So Many Toys So Little Time
17. Elaine Fleming at Studio Elaine
18. Linda Callahan at Stampin' Seasons
19. Kerry Willard Bray at stampgoodness
20. Shirley Sumption at Look at my Cute Stuff.
21. Dawn Tidd at Tiddbits from Dawn
PPA182 Color Challenge
Today's card was made for the PPA182 Color Challenge. The colors are: Very Vanilla, Smokey Slate and Elegant Eggplant. I have made a few cards with the Vanilla and Eggplant before and Smokey Slate seems to blend nicely with everything. I love how the framelits make it so easy to add a frame so quick and easily!

To check out the other submittals for this challenge click here.

PPA180 Sketch Challenge

I am always looking for quick and easy “man” cards because it typically is a request to do them for my workshops. It is the flu season and this will fit the bill for a male get well card. That’s because they drive us crazy when they don’t feel good!
To view the other cards submitted for this challenge click here.

PPA179 Color Challenge
Today's card was made using Crushed Curry, Crumb Cake and Rich Razzleberry. I don’t know that I would have chosen these three colors for a card combination at any point on my own, but I love the finished project. The best part about participating in these challenges is being forced outside my comfort zone. To see the other cards entered in this challenge click here.

I hosted a stamping class yesterday so I was already in the creative zone and found that this card just fell into place. I knew I would use the Bird Builder punch with the Crushed Curry, so it was just a matter of which of the remaining two colors would showcase them better. I decided to use Crumb Cake as the base and Rich Razzleberry for the “showcase” color. The sentiment was embossed in gold and was really the only embellishment this card needed beside the basic pearls for their eyes.
A quick and clean card to put together to let someone know that their friendship puts you in a special place.
Information & Order Numbers:
Stamp: Best of Everything (retired)
Ink: Versamark (102283) Gold Embossing Powder (109129)
Paper: Crumb Cake (120953) Crushed Curry (13119) Rich Razzleberry (115316) Brights DSP Series (130134)
Cool Tools: Bird Builder punch (117191) Large Oval punch (119855) Scallop Oval (119856) Embossing Buddy (103083) Heat Tool (129053) Framed Tulips (121809) Big Shot (113439)
Finishing Touch: Stampin’ Dimensional (104443) Pearl Basic Jewels (119247)
November Blog Hop
Thank you for joining us for the November Pals Blog Hop. We are thankful you are visiting today and hope you enjoy our thank you inspired projects.
You should have just left stop number 17 on the Pals Hop - Susan Itell at Simple Stampin' If so, you are in the right spot. If you get off track, the full blog lineup below will help you move along from blog to blog so you see all of the amazing creations.
As I have mentioned many times before, Thank You cards are my favorite type of greeting card to make. There is always a reason to thank someone and brighten his or her day. To me, the unexpected greeting cards that I receive are the best ones! This Thank You card is specific to Thanksgiving. I guess the turkey was your first clue...
It is the time of year dedicated to counting our blessings and finding gratitude in our everyday lives.
Happy Thanksgiving to each and everyone of you.
.

I used the Very Vanilla card stock as the base to tone down the overall brightness of the card. The Epic Day This and That designer paper has a white background. I wouldn’t normally mix the white with vanilla but I found that it worked and dared to be different. I cut a strip 5” x 3 3/4” of the designer paper to place upon a 5 1/4” x 4" piece of So Saffron card stock. The Scallop Trim Border punch was used along the edges on the side and Baked Brown Sugar 3/8” Taffeta Ribbon was placed along the top and the bottom edges. I used the circle framelits to cut through both layers and also to cut out the So Saffron circle border. The border was used to frame the turkey that was stamped in Baked Brown Sugar, using a portion of a stamp from the Harvest of Thanks set. I added dazzling diamonds and sponged on top with Baked Brown Sugar. The label was made using a die from the Apothecary Accents framelits set. The edges of the label and the edges of the designer paper were sponged with Baked Brown Sugar. Basic Gray, Baked Brown Sugar and Calypso Corals were the inks used in the greeting, to tie into the background. Dimensionals were used to pop the greeting and to give it depth. I also pierced along the label edges for added texture and added some basic pearls for the ta-da factor.
The next stop is Donna Kopenski at Craftycardmaker, stop number 19 on the Pals Blog Hop! Thanks for visiting – and I hope to see you next month!


- Nicole Watt at Pixel Maven's Retreat
- Ann Schach at The Stampin' Schach
- Katy McGloin at Just Fun Stamping
- Camen Sublasky at The Creative Stamptuary
- Shirey Sumption at Look at my Cute Stuff
- Mary Fish at Stampin' Pretty
- Connie Lindsey at Crafting a Joyful Lif
- Michelle Gleeson at Stampinmojo
- Shannon Hokanson at Paper Works
- Colleen Mollema at Uncanny Crafting
- Lynn Kolcun at Stamping With Avery's Owlery
- Kerry Willard Bray at Stampgoodness.com
- Debbie Mageed at Secret Stamper
- Amy L. Lazzell at Just A Thought...Cards by Amy
- Lisa Davis at Cherry St. Paper Treats
- Shannon Jaramillo at ezpeasycards
- Susan Itell at Simple Stampin'
- Martie Pollard at The Crafty Bandit
- Donna Kopenski at craftycardmaker
- Rae Harper at Wild West Paper Arts
- Sherrie Gross at Stampin' Sunshine
- Lisa Ann Bernard at Queen B Creations
- Linda Callahan at Stampin' Seasons
- Diane Roberts at Score at Four and a Quarter
- Brian King at Stamp with Brian
- Beth Beard at My little craft blog
- Debbie Crowley at expressivelydeb...
- Dawn Tidd at Tiddbits from Dawn
- Sue Becker at Sue's R n R Stamping
- Nancy Gleason at My Stampin Space
- Peggy Noe at prettypapercards
- Marlene Heringer at So Many Toys in Schertz
PPA178
I have been a busy lady these past couple of weeks. Saturday found me hosting my stamp club and on Sunday coordinating a workshop for 10 women who made 10 different Christmas cards each. That was a lot of prepping for the finished product which I managed to get done by splitting the prep work in the morning before work, on my lunch break and in the evening after the kids went to bed. Catching up on the leaf pick up also snuck up. Almost an acre with a dozen or so trees keeps us busy this time of year.
I have missed you!!!
Here are the PPA178 Color Challenge colors. Click here to see the other cards submitted for this challenge.

Today's card was made for the PPA178 color challenge. I bought that stamp awhile ago but this was the first time using it. Makes me smile thinking that “OF COURSE IT WOULD!!!”

of course it would!!!
PPA177
Here is my submittal for the PPA177 sketch challenge. This card represents being in the here and now, as the beautiful colors of fall leaves are abundant both on the trees and the ground. It also represents how I am feeling today. Thankful thoughts and appreciation for a wonderful weekend spent with family and friends. If you would like to see other cards in the PPA177 gallery - click h ere.

Thankful thoughts aplenty...
PPA176 Deb Rock
PPA176
I attended a four-day scrapbooking event this April in Jackson, NH. I met a lovely group of women who have made this event an annual get together. One of them was Deb Rock. She watched me make cards and was interested in giving it a try. I could not find anyone local to her that offered classes so she drove over an hour and a half to be my very first class customer this past June. Yesterday’s class was her fourth trip down! At each class everyone leaves anxious to go home and create his or her own cards. I love that I inspire that in them!

Deb's 1st Challenge Card
Deb has shown an interest in trying the PPA challenges and after yesterday’s card class and her long drive home she made this card. I awoke this morning to find it in my email and had just a quick minute to get this posted and her entered into the challenge before I left for work. To see the other entries from this challenge click here.
If anyone would like to leave a comment for Deb, I will be thrilled to share it with her.
Are You Sisters?
I am so excited that my daughter will be flying in from Colorado for a quick visit next weekend. We call them “hit and runs.” Two years ago we spent eight days at the Ritz Carlton in Jamaica, just the two of us. I thought it would be great to spend some one on one time away from both of our home fronts. Allowing for none of the everyday interruptions. It was a dream vacation with a good mix of exploration and relaxation.
I started a scrapbook for her shortly after our return. It has sat by the wayside since I took my first card making class last April! I have been busy this past week plugging away on completing her scrapbook for her upcoming visit. I have always loved to scrapbook, but love that I can incorporate all my new card making techniques to the mix! The first night we sat down to dinner, the hostess that seated us asked us if we were sisters…
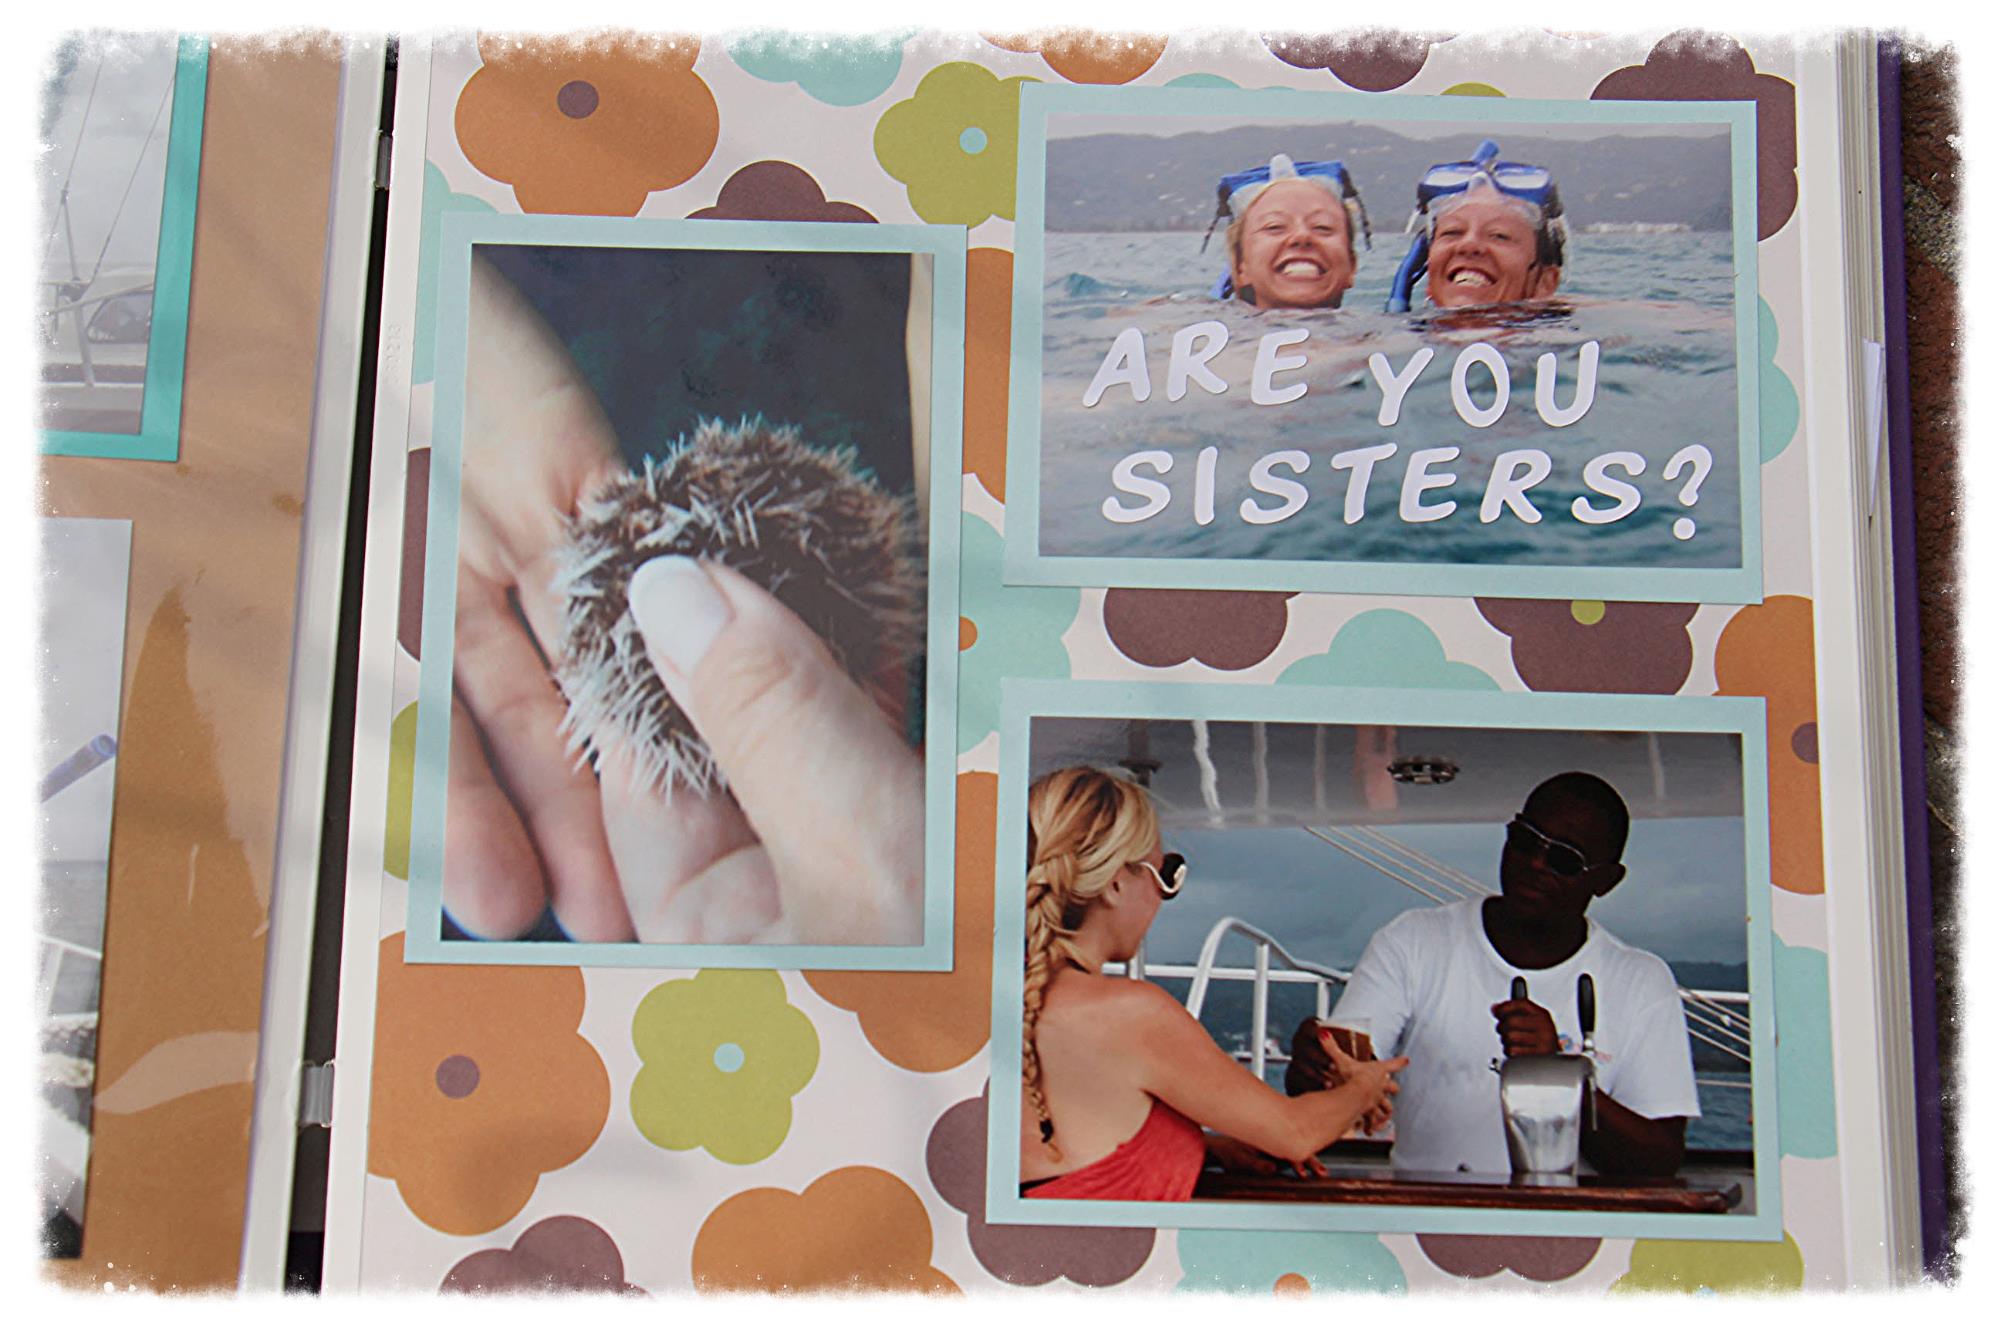
Jamaica Shenannigans
It happened a few times over the week and in this picture it truly does look like we are! So, this week my card making has taken a back seat for a good cause! Will be making the PPA sketch card to post before Monday. See you then!
PPA175 Color Challenge
Here is the color palette to be implemented in the PPA175 Challenge. Not your typical Christmas colors, but I thought I would see what I could do with it. To see the other cards submitted for this challenge click here.

I used Cajun Craze card stock for the base, and ran a 5 1/4”x 4” piece of Always Artichoke card stock through an embossing folder with an evergreen and berry design for the next layer. I stamped the tree in Artichoke, the star in Simply Saffron and the planter in Cajun using the Pennant Parade stamp set. To create the Saffron frame, I cut the tree out with an oval framlelit and used the same size framelit inside a larger oval framelit. I used a paper hole punch to create the circles of Cajun, and placed the smallest pearls from the Basic Pearls inside them, for a bit of ta-da. I glued a pinch of dazzling diamonds on the star and added some glitter candy dots as the ornaments. To complete the card I stamped merry from the Pennant Parade stamp set in Real Red, cut with an 3/4" x 15/16" oval punch and popped up with dimensionals.

not your typical Christmas colors....
What happens in Atlanta - stays in Atlanta....well, some of it!

Atlanta "Regionals" Crew
Weekend in Atlanta
Last weekend I flew into Atlanta, GA to meet and stamp with 20 other members of my extended Stampin’ Up! “family.” I did not know a soul before I left other than the interaction I have had with some of them on our Facebook page. By the time I headed home I felt like I had known them forever! I have not laughed so hard in I cannot remember how long! Not just laughed hard, but continuously! Was good for my soul.
We spent all day Saturday focusing on stamping techniques, card swapping, playing games and a CHOPPED CARD challenge. The challenge was we all had a bunch of “ingredients” we had to work with, but we all had to include a few of the same ingredients and had 30 minutes to complete the challenge. I cannot wait to share my own version of this challenge with my stamp club November 2nd.

my swap card design

secret ingredients for the Chopped Card Challenge
I am sharing with you today the cards I made for the swap and the card I made for the challenge. For the swap cards (we each made 20 cards to swap with each other) I made 1 (one) style of card, but made 2 of each 10 card stock colors that I chose, so that I had a variety to share. The one pictured is made with Smokey Slate and Blushing Bride. For the challenge card we each had to use the Epic dsp, the punch, washi tape, indigo blue ribbon and the hello lovely stamp set. The brown paper bag with the prominent NO PEEKING label certainly got our attention. Every minute of my trip was enjoyable. My two favorite memories would have to be Mary Fish using her butt to point in the Charades game (as you could not point with your fingers obviously) and dinner for 20 at the family style Italian restaurant. A great way to relax and wrap up a great day!

finished card - Chopped Card Challenge
October Blog Hop

Thank you for joining us for the Pals Halloween Blog Hop. We hope you enjoy our virtual trick-or-treat hop where you will either learn great tricks for your creative projects or take a chance to enjoy a blog candy treat.
You should have just left stop number 9 on the Pals Hop - Mary Fish at Stampin Pretty. If so, you are in the right spot. If you get off track, the full blog lineup below will help you move along from blog to blog so you see all of the amazing creations.
Halloween is coming fast upon us. This month’s blog hop is sure to inspire you with some ideas for your own Halloween cards. I have eight and nine year old boys who were only too happy to cheer me on while I was creating this blog hop card! I drew the line when they suggested to draw blood dripping from the eye sockets. I was already nervous that it was too "outside the box" to share on my blog, but came to the conclusion – it is a Halloween card and it would be perfect for your favorite guy! This will be sent to my daughters’ favorite guy…hope you like it Scott!

Don't Cross Me...
I used the Gorgeous Grunge stamp set to create the look of blood splatter, using Real Red on Whisper White cut at 5 ¼” x 4” and adhered to a Basic Black base card. Using the Real Red marker vs. the ink pad and stamping off a few times after each stamp, gave the effect I was striving for. HERE IS MY TRICK - ONLY EMBOSS OR INK PART OF THE STAMP TO CREATE A TOTALLY NEW LOOK! Next, only a portion of a stamp from the Halloween Bash set was embossed to read HALLOWEEN. I also embossed only a portion of a stamp from the So Sorry set. The word that was eliminated from the stamp that reads “that bad things happen to good people.” That changes the meaning of the intended saying on the stamp dramatically.

cropped stamps examples
A strip of the Witches’ Brew Designer Washi tape was placed across the card and topped with a black card stock circle, a red glimmer paper circle and the skull from the Witches’ Brew Designer paper cut into a circle. Basic Black candy dots on opposite corners and a white gel pen dot in the center of the eye sockets added the finishing touches to complete this card.
If my card gives you the heebie jeebies, then I have accomplished my mission! Leave me a comment if you dare...your feedback is my inspiration!!!
Information & Order Numbers:
Stamp Set: So Sorry (Wood-mount 132585, Clear-mount 126527) Halloween Bash (Wood-mount 130577, Clear-mount 130580) Gorgeuous Grunge (Wood-mount 130514, Clear-mount 130517)
Paper: Basic Black (121045) Red Glimmer (121790) Witches’ Brew DSP (132185)
Ink: Real Red marker (100052)
Cool Tools: Big Shot (113439) Magnetic Platform (130658) Circles Collection (130911) Versamark (102283) Black Stampin’ Emboss Powder (109133) Heat Tool (129053) Embossing Buddy (103083)
Finishing Touches: uni-ball Signo Gel Pen (105021) Neutrals Candy Dots (130934) Witches’ Brew Designer Washi Tape (132156)
The next stop is Colleen Mollema at My Crafty Habit - stop number 11 on the Pals Blog Hop! Thanks for visiting – and I hope to see you next month!


BLOG HOP LINEUP
- Lynn Kolcun at Stamping with Avery's Owlery
- Angela Curry at Kindred Stampers
- Maggie Mata at Maggie Made Cards
- Kelly DeTommaso at Kelly's Creative Corner
- Debbie Crowley at expressivelydeb...
- Rae Harper-Burnet at Wild West Paper Arts
- Julie Trevett-Smith at The Stampin' Affair!
- Kerry Willard Bray at Stampgoodness
- Mary Fish at Stampin' Pretty
- Martie Pollard at The Crafty Bandit
- Colleen Mollema at My Crafty Habit
- Lisa Davis at Cherry Street Paper Treats
- Lisa Ann Bernard at Queen B Creations
- Nicole Watt at Pixel Maven's Retreat
- Nancy Gleason at My Stampin Space
- Beth Beard at My little craft blog
- Linda Callahan at Stampin' Seasons
- Sherrie Gross at Stampin' Sunshine
- Peggy Noe at Prettypapercards.com
- Debbie Mageed at Secret Stamper
- Katy McGloin at Just Fun Stamping
- Susan Itell at Simple Stampin'
- Shirley Sumption at Look at my Cute Stuff
- Sandra Conner at Pretty Provisions
- Carmen Sublasky at The Creative Stamptuary
- Margaret Moody at Margaret Moody
HELLO HELLO

You've got my attention now!
I have been very focused on card making these last few weeks. I am scheduled to host a table at an upcoming community event. The table will contain cards for sale that I have made and I will be demonstrating some of the tools and gadgets used in the making of the cards. My goal has been to have a good amount of inventory as well as variety. That translates into me pulling out all the stamps and getting busy. I purchased the Secret Garden Stamp and framelit bundle a few months ago and had yet to use it. It sure got used yesterday. I made a dozen of these cards in a variety of colors. The frame for the greeting was the 2nd smallest label frame from the Deco Labels framelits. The same size frame was used to cut the piece of cardstock for behind the greeting. The cardstock was then cut in half lengthwise and placed underneath the greeting. I popped up the greeting and the smallest flower with dimensionals. The pearls and rhinestines were added for the WOW factor.
Information & Order Numbers:
Stamp Set(s) Mixed Bunch (Wood-mount 128442, Clear-mount125537) Secret Garden (Wood-mount 131940, Clear-mount 129144) Hello Hello single stamp
Paper: Primrose Petals (126841) Daffodil Delight (119683) Tempting Turquoise (102067) Real Red (102544) Pear Pizzazz (131201) Whisper White (100730)
Ink: Primrose Petals (126858) Bermuda Bay (131171) Chocolate Chip (126979) Old Olive marker (100079)
Cool Tools: Big Shot (113439) Magnetic Platform (130658) Secret Garden framelits (129372) Deco Label Collection framelits (130102) Embossing Folder (n/a)
Finishing Touch: Pearl Basic Jewels (119247) Rhinestone Basic Jewels (119246) Stampin Dimensionals (104430)
PPA173 Sketch Challenge
Here is the sketch... to see the other cards submitted for the challenge - click here.

Today’s card was made using basic black, pool party and very vanilla. I love the way the pool party accents the black and makes it pop, while on the other hand the very vanilla tones it down. It is a very striking and complimentary color combo. I knew immediately upon seeing the sketch that I would like the finished product no matter what color combo I used! I can envision so many other greetings and color combos using this layout. Hello There to my new favorite layout.
Here is my card...

I also determined on the last sketch how much more enjoyable it was for me assembling the card using just the sketch. By not seeing any of the other cards before I bagan mine, not even the judges, it allowed me to not be influenced by a single thought. This card is made with just the sketch layout of the card as a tool. You would think that it would be harder to create without any inspiration, but for me it seems to be helpful. Who knew? Having only been involved in card making for such a short time, I can clearly remember sitting and staring at my blank piece of paper and thinking, “I’ve got nothing.” I spent a lot of time scrolling through websites looking at cards for inspiration. Not any more! Progress has been made!
Product Information + Order Numbers :
Paper: Basic Black (121045) Very Vanilla (101650) Pool Party (122924) Modern Medley DSP (126926)
Ink: Stazon Jet Black Ink (101406)
Stamp Set: Timeless Talk (Wood-mount 126605, Clear-mount 126607)
Cool Tools: Big Shot (113439) Magnetic Platform (130658) Squares Collection (130921)
Finishing Touch: Subtle Candy Dots (130933) Pearl Basic Jewels (119247) Black Ribbon n/a
PPA172 Sketch Challenge
PPA 172 Sketch Challenge

I received my goodie package in the mail today and could not wait to put to use my new Halloween washi tape. It just so happened that it came packaged as a set of three. The same exact number of stripes as needed for the challenge card! How perfect was that? I was amazed at how easy the washi tape was to work with. I made a card with just the washi tape, one with just the black twine and then this one with the twine atop of the washi tape. Bingo!
I have noticed that there are scary Halloween cards and cute Halloween cards. This is a good blend of both scary and cute. Kind of like me when I first wake up…lol.
To see the other cards in the PPA1 72 Sketch Challenge click here.
.

give me something good to eat
PPA 171 Color Challenge
PPA 171 Color Challenge

I am such a fan of doing this weekly challenge. With a full time job and three elementary school age children it is tough to find a “me moment.” Knowing that I want to participate in the challenge forces me to think outside my box….which is family, work, chores, exercise and life’s challenges. I find the time to fit some joy in the schedule. Momentarily, a half dozen women will be arriving for a 10 card stamp-a-thon. I have diligently been prepping their cards all week. It is a good mix of Halloween, Christmas, Wedding, Birthday and Thinking of You cards. I needed a quick and easy card in order to participate in this challege! Click here to see the rest of the challenge. Anyone can participate and I highly recommend you do!
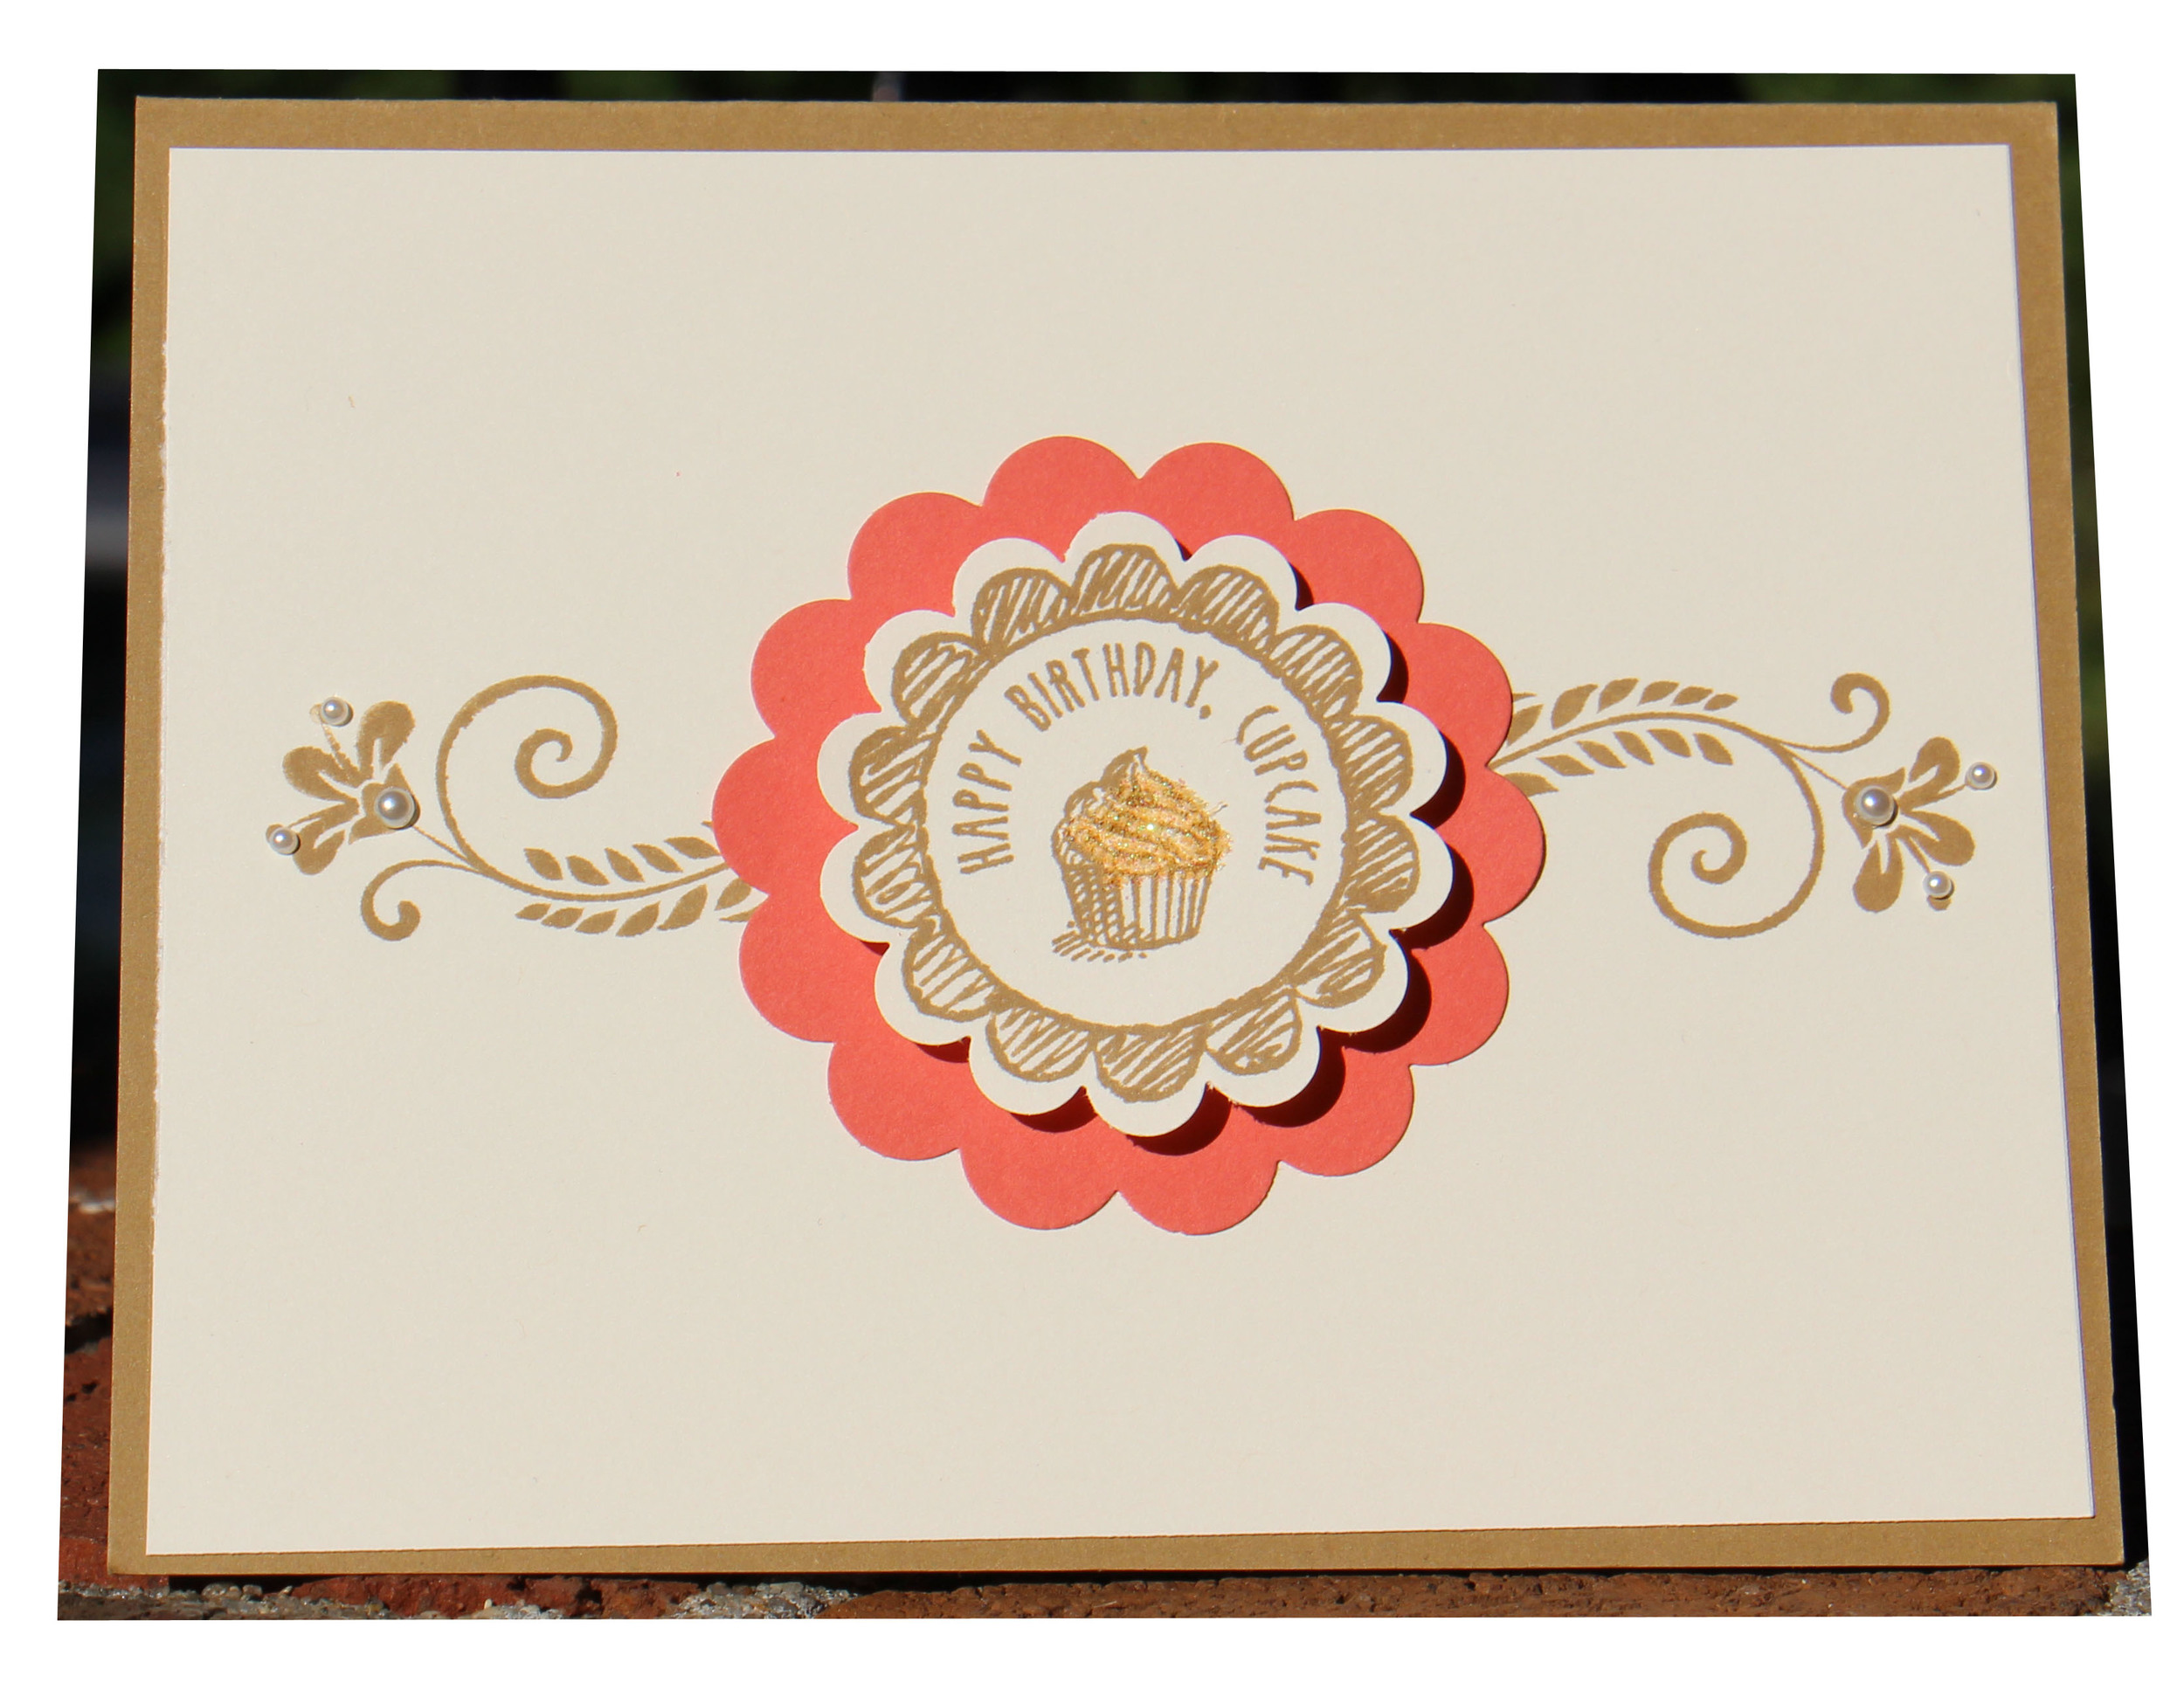
Cupcake for my cupcake